Nameservers or DNS Records: Domain and Hosting Setup for SMBs


You need two things to get a website live: a registered domain and an active hosting plan. Connect them by pointing your registrar’s nameservers at your host, or by adding A and CNAME records to your registrar’s DNS panel so they resolve to your host’s IP address. Once that’s done, enable SSL, add the domain inside your hosting control panel, and give it up to 48 hours to propagate fully.
TL;DR:
- Using nameserver delegation simplifies DNS management and minimizes ongoing maintenance, while managing DNS records at your registrar grants more control for email and services.
- Register your domain separately from hosting and ensure you set auto-renew, securely store credentials, and verify DNS propagation before launch.
- Enable SSL before releasing the website, and force HTTPS redirects to secure visitor connections, while updating internal links to use HTTPS.
- Regularly test DNS propagation with tools like whatsmydns.net and confirm SSL, email, and analytics functions are working correctly after setup.
- Consider hiring a managed service to handle domain, DNS, SSL, and website setup for a smoother launch and easier troubleshooting later.
Table of Contents
- Preflight checklist before you touch any DNS setting
- How to register a domain and connect it to hosting
- Installing your CMS and turning on SSL
- How do you check if DNS has propagated?
- Quick fixes for the most common setup problems
- When to hire help: how Tech Business Development approaches domain and hosting setup
- Setting up email accounts with your hosting provider
- Backup and restore strategies for your website and domain
- Security practices beyond SSL
- Author perspective: three practical launch tips from the field
- Get a managed domain and hosting setup without the DNS panel headaches
- Sources
Preflight checklist before you touch any DNS setting
Half the frustration in a domain and hosting setup comes from missing a login at the worst possible moment. Gather everything first.
- Your registrar username, password, and (if transferring an existing domain) the transfer authorization code.
- Hosting account credentials, plus either the nameservers your host provided or the server’s IP address.
- A decision on platform: WordPress, a static site, or a builder like Wix.
- A backup plan for the site’s files and database before you make any changes.
- A choice on whether DNS lives at your registrar or gets delegated to a specialist like Cloudflare.
Beginners often buy a domain and hosting from the same company because it’s simpler, but that convenience can cost you DNS control and portability down the road, especially if you later want to run email through a separate provider or move hosts without touching your domain.
How to register a domain and connect it to hosting
Registering the domain and buying hosting are two separate purchases, even when they come from the same vendor. Here’s the order that avoids downtime and rework.
- Pick a registrar and register the domain. Choose your top-level domain (.com, .ca, .io), fill in the WHOIS contact details, and decide whether you want privacy protection to hide your personal information from public lookup. Most registrars include this free or for a few dollars a year.
Method A: Nameserver delegation. Your host gives you two or more nameserver addresses (something like ns1.yourhost.com). Log into your registrar, find the DNS or nameserver settings, and replace the default values with your host’s. This hands over full DNS management to your host, and it’s the simplest way to connect a domain to a server because you never have to touch individual records again.
Method B: A and CNAME records. Find your hosting account’s IP address, then go to your registrar’s DNS management panel and create an A record pointing your root domain at that IP, plus a CNAME record pointing “www” at your domain. This keeps DNS control at the registrar, which matters if you host email or other services elsewhere and don’t want your host managing those records too.
- Add the domain inside your hosting control panel. In cPanel, this usually means creating an “Addon Domain” and pointing its document root to the right folder. Other dashboards call it a “custom domain” or “site mapping,” but the concept is identical: tell the server which files to serve when someone types your domain.
Pro Tip: If you’re not sure which method to use, default to nameserver delegation. It’s the lower-maintenance option, and you can always switch to individual DNS records later if you need finer control.
Some businesses skip the registrar entirely for DNS and route everything through a dedicated manager like Cloudflare, which adds a security and performance layer on top of standard DNS zone setups. This option is worth considering once your site gets real traffic, but it’s overkill for a first launch.
Installing your CMS and turning on SSL
Once your domain resolves to your hosting account, it’s time to actually build something there.
- Use a one-click installer for WordPress if your host offers Softaculous or a similar tool. It takes under five minutes and handles the database setup automatically.
- Upload files manually via FTP to the public_html folder if you’re running a static site or a custom build.
- Enable free SSL (usually Let’s Encrypt) from your hosting control panel. Most hosts issue certificates automatically within minutes of the domain connecting, though SSL should be active before you announce a launch, not after.
- Force HTTPS redirects so visitors never land on the unsecured version, and update any internal links or image URLs that still reference http://.
- Lock down the basics: a strong admin password, a fresh backup, and user roles that don’t hand every collaborator full admin access.
Recall that domain and hosting are two distinct things connected by DNS: the domain is the address, hosting is where the files actually live. SSL is what secures the connection between the two.
How do you check if DNS has propagated?
Run your domain through whatsmydns.net to see how it resolves across dozens of global servers, or use nslookup yourdomain.com (Windows) or dig yourdomain.com (Mac/Linux) from a terminal to confirm it points at your host’s IP.
DNS propagation typically finishes within 2 to 48 hours, though most visitors will see the new site far sooner depending on their internet provider’s cache settings.
Once it resolves, run through this list:
- Confirm the padlock icon shows in your browser and there’s no mixed-content warning.
- Test load speed with Google PageSpeed Insights and check how the site renders on mobile.
- Submit your contact form and check that the email actually arrives. If you’re using a separate email provider, confirm MX, SPF, and DKIM records are correctly set.
- Log into GA4 and check the real-time report while browsing the site yourself. If you see zero activity after 30 minutes, the tracking code likely isn’t firing.
Quick fixes for the most common setup problems
Most domain and hosting hiccups fall into a handful of predictable buckets.
- Still seeing the old site? Clear your browser cache, flush any CDN cache, and check a propagation tool like whatsmydns.net before assuming something’s broken. It’s usually just TTL expiry in progress.
- SSL warning or “not secure” message? Confirm the certificate actually issued in your host panel, then check for mixed content, images or scripts still loading over http://.
- Emails not arriving? Check your MX records first, then SPF and any provider-specific TXT records your email host requires.
- Still stuck after 48 hours? Contact your registrar if the issue is nameservers or domain status, contact your host if the issue is server-side, and bring in a consultant if you’ve spent more than a few hours without resolution.
When to hire help: how Tech Business Development approaches domain and hosting setup
Not every small business owner wants to spend an afternoon inside a DNS panel, and that’s a reasonable line to draw. A managed setup service typically covers:
- Domain registration or transfer, plus nameserver or DNS record configuration.
- SSL activation and HTTPS redirects handled from day one.
- CMS installation, analytics and tag manager setup, and initial backup configuration.
Pro Tip: Ask any provider for a handover document listing every credential, nameserver value, and DNS record they configured. Without it, you’re locked out of your own site if the relationship ends.
Most managed setups finish within a few business days, with post-launch monitoring included to help avoid extended downtime caused by DNS issues.
Setting up email accounts with your hosting provider
Most hosting plans include email hosting tied to your domain, so name@yourbusiness.com is usually included rather than a separate purchase. Inside your control panel, look for an “Email Accounts” section where you create each address and set a password.
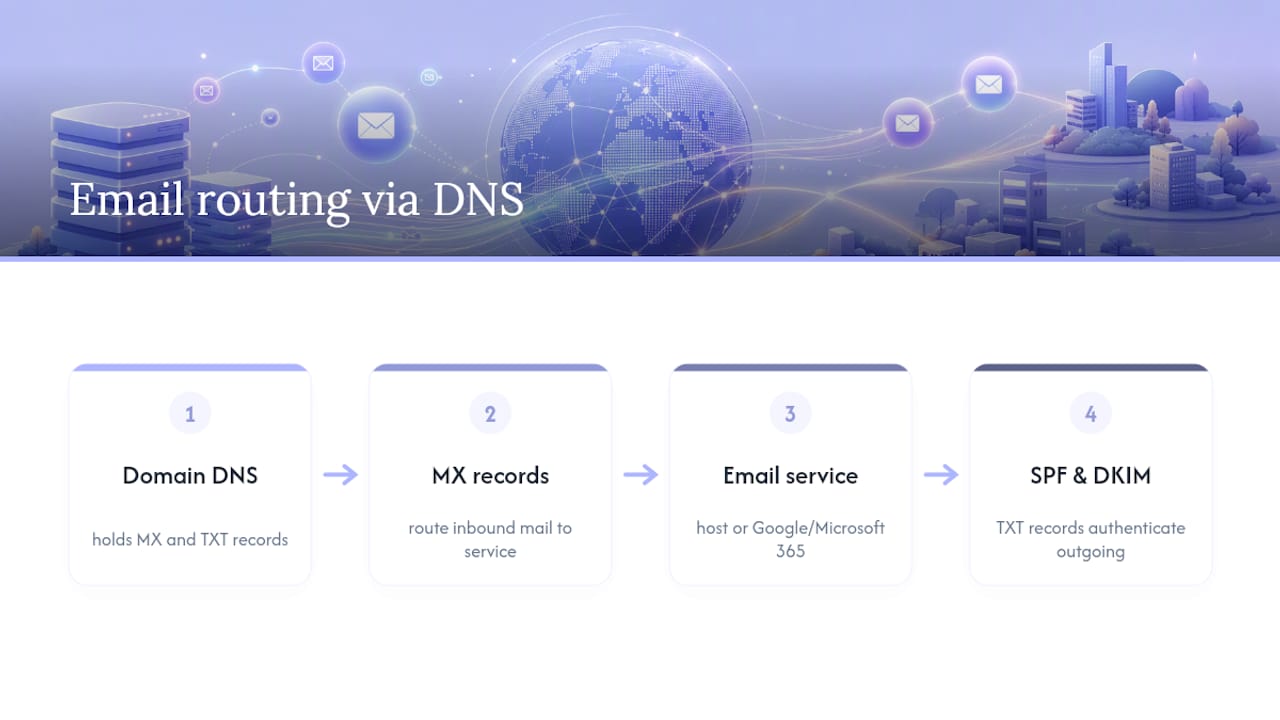
The part people miss is the MX record configuration. If you’re using your host’s built-in email, the MX record usually points there by default. If you’re routing email through Google Workspace or Microsoft 365 instead, you’ll need to update the MX records at your registrar or DNS provider to point at that service, and add SPF and DKIM TXT records so your outgoing mail doesn’t land in spam folders.
Test every account by sending a message to it from an outside address (a personal Gmail account works fine) and confirming it arrives, then reply and confirm the outbound message doesn’t bounce. Set up at least one catch-all or forwarding address for the most common typos of your main address, and configure autoresponders for anything customer-facing so nobody emails into a void over a weekend.
If you’re weighing which route fits your business, Tech Business Development’s guide to setting up business email walks through the MX, SPF, and DKIM specifics in more depth than fits here.
Backup and restore strategies for your website and domain
A hosting outage is annoying. A hosting outage with no backup is a business emergency. Most hosts offer automated daily or weekly backups as part of the plan, but “included” doesn’t always mean “restorable in one click,” so check exactly what your plan covers before you need it.
At minimum, keep three layers: a host-side automated backup, a separate off-site copy (a plugin like UpdraftPlus pushing to Google Drive or Dropbox works for WordPress), and a manual export you pull before any major change like a plugin update or theme switch. Domain-side, the risk is different: losing access to your registrar account or missing a renewal. Set auto-renewal on, use a password manager for registrar credentials, and confirm your recovery email on the account is current.
Test your restore process at least once. A backup you’ve never actually restored from is a guess, not a plan. Most hosting control panels include a one-click restore point; find it before an emergency, not during one.

Security practices beyond SSL
SSL encrypts the connection between your visitor and your server, but it does nothing to stop someone from guessing your admin password or uploading a malicious plugin.
A web application firewall, whether built into your hosting plan or added through a service like Cloudflare, filters out obvious attack traffic before it reaches your site. Most managed WordPress hosts include one by default; check your plan’s feature list to confirm.
Run periodic malware scans, either through your host’s built-in scanner or a plugin like Wordfence or Sucuri for WordPress sites. Set two-factor authentication on every admin-level account, not just your own, and limit login attempts so automated bots can’t brute-force their way in. Keep your CMS, theme, and plugins updated, since outdated software is one of the most common entry points attackers rely on. None of this replaces SSL. It sits alongside it.
Author perspective: three practical launch tips from the field
Build in a 48 to 72 hour buffer for DNS changes, and test the new site on a few different devices and networks before calling it done. Keep the old site live until propagation fully completes rather than tearing it down early, and hold onto a fresh backup the entire time. Document every credential as you go, ideally in a shared password manager, so handoff to a partner or new hire doesn’t turn into a scavenger hunt.
— Shayan Shirvani
Get a managed domain and hosting setup without the DNS panel headaches
A managed service can handle the entire domain and hosting setup as one package instead of leaving you to coordinate a registrar, a host, and a DNS panel on your own: domain registration or transfer, DNS delegation, SSL activation, CMS installation, analytics and tag manager setup, and a backup plan, all documented in a handover checklist you actually keep.

There’s also a partner-minded way to think about this decision: as one write-up on hiring a partner instead of a vendor puts it, the value isn’t just the setup itself, it’s who answers the phone when something breaks six months later. To get a quote, have your domain name, your current hosting details (or your preference for a new host), and your target launch date ready. Reach out through Tech Business Development and expect a response within a business day or two, with most standard setups completed well before the average DIY timeline.
Sources
For readers who want to go deeper on any single piece of this setup, these are worth bookmarking: